Friday 27 November 2015

character and Narrative: Scene 4

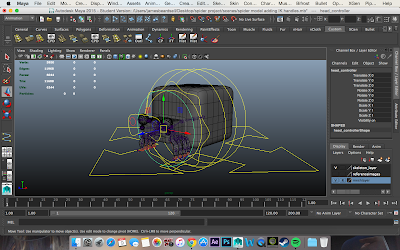
In this scene the spider jumps back in fear of the hight and shuffles back up the branch backing away from the edge. The animation in this scene was fun to create because there was a lot of jiggle in the butt, also it was fun to try and animation the jump in the scene because I wanted it to look a realistic jump but also a pathetic scared jump, which I hope I've achieved.

However, the hardest part of the animation was the jump because there where multiple controllers I had to move at the same time. Controlling eight legs when a spider has to jump up and down is quite challenging but I feel like I've managed well but the legs do pop out at the top of the jump which annoys me so I might go back and fix that later on. The wiggle back that the spider does after it jumps is to show that the spider is cowering away from the edge. I show this by animating the butt moving side to side whilst also moving the main controller backwards to give the effect of the spider shuffling backwards in fear. 


Character and Narrative: Scene 1-3

In this first scene I animated the spider is walking towards the edge of the tree branch so that it can see the apple on the ground. Animating this scene was quite hard at first because I had to put in a walk cycle but after that it was simple enough, I did after that was make the spiders butt jiggle and also make its body shake so that it looks scared when it look at the distance between the branch and the apple. 

Doing the camera work was interesting because I added a dolly zoom, this is where the camera moves back from the subject/object but also zooms in which gives it that cool effect and adds intensity to the situation. This video below is just a test play blast just so that I can see what the animation will look like, so the spider in the video will have a different texture to it and the lighting will be different in the final edit as well.

All in all I feel like I've done a good job and Oscar seems to approve on it which it good, adding the texture and the lighting will be easy enough to do. One problem did arise when I tried importing the environment into the spider scene file which was that Maya kept crashing on me, so I solved that by importing the spider into the environment scene file and that just scaled both the spider and the environment so that they fit together correctly.    


Character and Narrative: Who is Doing What When Animating

When it comes to animating Oscar and I have come up with a plan so that we can evenly deal out work to one another. We decided to animate are own characters, however my character is shown the most throughout the animation so Oscar will animate a couple of scenes with my character so that the work load is equal.

In are animation there are twenty scenes throughout the story, so we decided that I could do scene 1, 2, 3, 4, 5, 9, 10, 11, 12, 19 and 20 that gives me 11 scenes but Oscar will be doing the title sequence as well as the scenes so that equals that out. After we finish animating we will that work on the lighting and put the whole thing together in After Effects, whilst fixing a few thing and neatening stuff up.

Doing all this will be easy because we now share a google drive folder so we can upload are scenes and have a look at each others work and give each other feedback. We also live together so if we do need each others help we can literally walk up to one another and have a talk about work. I find are time management is doable because we will be animating in one week, post production another week and then rendering the week after that.

Thursday 26 November 2015

Character and Narrative: Test Animation

Before I started animating I wanted to see how my spider would look like walking, so what I did was I looked at some references of spiders walking and tried my best to imitate the movements onto my spider in Maya. I knew this wasn't going to be easy because I've got eight legs to move around and the body to move up and down to. I found a really good reference gif to work off of because when I downloaded it off the internet it downloaded as an image sequence which gave me step by step reference images to work from. 

The hardest thing about a spiders walk cycle is that not all the legs move at the same time so I can't just select some legs and move them together, I have to move each leg separately, however there is a patten in the walk cycle. The patten goes as followed; on the left side of the spider the first and third leg go together but the third leg has a slight delay on it, the second and fourth leg then goes together after the first and third leg, with the fourth leg having a slight delay on it as well. On the right sider of the spider it's exactly the same but the other way round with the legs i.e the second and fourth leg starts moving first then the first and third leg moves afterwards. 

This was for me very hard to get my head around and it took me at least two hours to complete this task. This was because I kept having to look back and forth at the reference images multiple times just for one leg then repeat that another seven times. 


Character and Narrative: Environment With Texture

After me modelling the environment I gave the scene to Oscar so that he could texture the environment. He had a good idea when he started texturing it an it was that most of the time the camera would only be showing one side of the park, in which case we could be cheeky and get ride of the trees on the other side so that it would be easier to render out. Oscar also changed some trees by adding some more on the side the camera will be viewing and just tweaked some trees so that they all don't look so similar. 

Oscar made a couple of textures for the trees which where designed in photoshop using a square brush so that the texture will also fit in with the style of the environment, however he also made a texture out of triangles but you can't really tell when you're looking at the full scene. 

All in all I think that adding the textures had made an improvement on the whole scene and it's made it look like a animatable park environment. However I still feel like we could of added a lot more to the scene like benches and tables maybe some more bushes along side the edges of the environment, but that will slow down the render time and plus that camera will be focusing more on the spider and inchworm that the environment.   


Character and Narrative: Making The Environment

For the animation Oscar and I wanted to have a park like environment for the spider and inchworm to be in. So this is what I've done in Maya, I created the big tree in the middle and then to make thing easier I just duplicated the big tree and changed the tree a bit so that its' not a an exact duplicate. I've also made a walk path to make it look like a park and a little pond round the tree so that it isolates the spider and inchworm from the rest of the trees. I did this so that it give the spider a purpose to get the apple at the bottom of the tree because it can't cross through the water.

I also made a UV texture map for the trees so that I can give it to Oscar so that he can his textures on the trees. Making the UV texture maps was simple enough to do because they were just boxes, but he hardest thing in this scene was probably organising the trees in the outliner and name everything because I did that all at the end, so I had to go through all the different trees to figure out which one is which then name and order them. I did this to make it easier for Oscar to texture the right tree.   

I would of liked to make this scene bigger and have more trees in it but if I did that it would take so long to render every scene out which is what I don't want. I feel like I've done a good job of creating a park like environment and I like how the trees are evenly spaced out between one another.


Saturday 21 November 2015

Character and Narrative: Posed and Turnaround

After I've done al the modelling and rigging for the character I now have to pose my character on a plinth and do a turnaround of the pose. For the pose I decided to make the demo character look like it's in a dramatic scene shouting WHY or NO because I thought it would look theatrical. For the plinth I went simple and just got a cylinder and moved the vertices around so that it would look like a a tiny stage. The lighting is positioned so the the light hits the character from above, just so that it gives the look of the whole thing more intensity.

Positioning the character was simple enough to do because all I had to do was move the legs apart and bend them a little, move the arms up and bend them to, curl the fingers and ark the back. It may seem like a simple pose but the simplest of poses can change the tension of a scene so quickly.       


Character and Narrative: Finishing touches on Demo Character

For the finishing touches to the demo character all I had to do was take off some attributes that were not needed, just so that it doesn't look overly cluttered with stuff that I do not need. For example the head only moves in the rotational values so it doesn't need to show the translation or the scale values as well. By hiding and locking the translation and scale values on the head that means that I won't be able to move the head by mistake, I'll only be able to move the head in the rotational values.

 I found this process easy enough to do because it's just getting rid of things I do not need, but it was a long task to do because I had to do this for every controller. I also cleaned up the outliner so that I have groups for certain things i.e. mesh group, skeleton group, controller group, etc. I did this so that when I come back to animate this character I'll understand where everything is and what it is. 


Character and Narrative: Adding Custom Controllers on Demo Character

Putting in the custom controls was really interesting to me because making things move how you want with just one click of a button made me feel like I was achieving new skills in maya and once I got the hang of creating custom controls I could do this process quite quick.

What I had to do was make controls for the hand so that the fingers would curl into a fist. I did this by  selecting the thumb and then going into set driven keys and then loading up the hand controller and then messing with the attributes and hitting key till you get what you want. 

For the feet I had to do the same but I had to do four different custom controllers which manipulated the foot in different ways, for instance pealing the heal, making the toe tap, making the character stand on the tip of its toe, and doing a toe twist. doing this was harder than the hand because some of the controls had to be created with other controls like the stand tip had to be created with the toe tap and peal heal together.       


Character and Narrative: Connecting Controllers to Skeleton on Demo Character

Connecting the controllers to the skeleton was simple enough to do because I've done it before on my spider model, however there was more to do so it did take longer than expected. I did find one bit harder than the rest because I made a mistake on the legs. This mistake was that instead of putting a rotation plane solver in the leg I put a single chain solver in, which meant that when it came to connecting the point constraint to the knee it wouldn't let me and I got so stressed and couldn't figure out why, until my tutor came over and told me what I'd did wrong. 

In a way I liked that I had a mistake because I found out how to solve the problem I had and then I could help my peers out when the same problem happened to them. I feel like I've leant and understood how to properly rigg a leg using IK handles.   


Thursday 12 November 2015

Character and Narrative: Binding Skeleton the Mesh on Demo Character

Binding this character was harder than the spider because there is more joints in the demo character than the spider. Which means more painting the mesh after binding and it takes a long time to do when you're not paying that mush attention. I still found it simple enough to go through and I feel like if I do another character I'll be able to do this without looking at my tutors tutorials again. I didn't find any difficulty when I was doing this but I did get confused at some bit because I would mistake different joints up like the back and chest etc. 


Character and Narrative: Orienting Controllers on Demo Character

Orienting the controls was easier this time round because I already knew what I had to do due to me doing it on my spider character before. But on this demo character I had to do something different to what I had to do on me spider, which was I had to to sort out the orientations on the forearm roll because the wrist was at a different angle to the forearm so we had to re arrange the wrist orientation so that was in the same rotation angle as the forearm. This is because the wrist rotates on the forearm and not actually on the wrist. If I didn't do this the wrist would twist at a weird angle and would not look right, it would look deformed. 

This wasn't hard to do this task but it was tedious and long because you had to manually orient the wrist join and then do the whole orientating mumbo jumbo on top of that, but luckily I could only do this once because I could that mirror the new orientated joints across to the other side.     


Character and Narrative: Binding The Skeleton To The Mesh / And Influencing The Weights

Binding the skeleton to the mesh was the next thing to do which sounds easier that in looks because after you bind the skeleton you then have to paint the mesh which influences the weight/vertices so that when you move the leg for instance the other vertices on the leg next to it don't move around as well. 

Binding itself was alright because you just select the joints you want it influence the mesh and that go to smooth bind on the tool bar and sort some settings out and then press bind. However painting the mesh was harder than it seems because you have to paint every single joint and sometimes you can get confused on what joint you're painting on.

Overall I found this quiet difficult to get my head around to start with but once I got in the groove I was alright but some joints I still need to mess with so that when the spider is moving it looks some what norman. 


Character and Narrative: Connecting Controles to the Skeleton

Now that the orientation had been done I then had to connect the skeleton to the controllers so that I could manipulate the skeleton to move about. To do this I had to constrain the skeleton/joints to the controls however some joints had to be constrained differently because for example the eyes had to use a aim constraint to the controller so that when you translate the controller around the eye would follow. Another example of a different constraint that I had to use was a parent constrain which just parents the joint to the controller and I had to use that for the root joint so that the controller could move the whole skeleton.

This to me was easy enough to do and simple enough to follow because it's just connecting one thing to another. In the pictures below show me showing you me manipulating the root controller by moving it down a bit which moves the the joints down but keeps the legs where they are.    


Caracter and Narrative: Orienting The Controllers To The Skeleton

In this part of making the spider I had to make sure that the orientation of the skeleton is the same as the orientation of the controls, because if I don't make sure there the same when it comes to move the character the character will distort or they will become out of line and rotate differently to what you want the joint to do. 

For this I had to create a null group and attach it the joint and then orient those both together, after you orient them I deleted the null group and parented the joint to the controller and then freezed the transformations. This to me was difficult to understand at first because you have to be careful not to orient the joins in world but orient the joints in object so that the translators actually move right and match up with the controllers. This happened to me the first time I tried to orient the joints and controllers together, so I learnt this the hard way and had to orient the whole thing again.   


Wednesday 11 November 2015

Character and Narrative: Creating The Skeleton and Controls

I now had to create a skeleton of the spider and then create some  controllers of the skeleton which would help manipulate the spider. Making the skeleton was easy to do because there was not many joints to create to make the spider move, the hardest part of the skeleton was the legs because the legs were so close together it was hard to see where a joint would go and how far away it was from the other joints. 

I then created some controllers and placed then on the skeleton were the skeleton would be manipulated and again the hardest part was the feet because I had to do eight different controllers for the eight legs there are. I didn't really need that many controls compered to the demo character I created just because the movements of the spider are quite minimalistic. After making the controls I then gave them a set colour, yellow for the middle of the spider, red for the right side of the spider and blue for the left side of the spider. I did this because it will help me see the controls better and it doesn't matter what colour I give the controls because they won't get rendered, however if you make a controller the colour green it will be hard for you to tell which controls you've selected, because when you select a control it turns green to let you know you've selected it.  


Character and Narrative: Finishing UV mapping

With UV mapping a character I had to go round the mesh and cut round the legs, head body, and then make seams down the sides of what I had separated so that I would be able to unfold the geometry like unfolding a sweetie wrapper. 

After I unfolded the net of the geometry I then had to organise each separate net so that the layout of all the nets put together would give some indication of the spider model. However, I did make one mistake by not cutting a seam correctly down on of the legs so that when I unfolded it, it just turned out to a bunch of squares bundled together. to fix this I had some help from my tutor and what we did was UV mapped the leg itself and then correctly cut down one side of it and unfolded it, then scaled it down to fit into the graph below on the left. 

I found this part simple enough to do once I've got my head around what I was supposed to be doing and I feel like I have UV mapped it well enough to understand hot to texture it later on when it comes to add detail to the spider.
    

Monday 2 November 2015

Character and Narrative: Making My Spider Character

Knowing what I learnt from my tutors tutorials about creating a character, I decided to start having a go a modelling my character for the animation about the spider. But before I could start modelling in maya I had to do something in photoshop so that it would make modelling my character in maya much easier.
What I had to do was get my character designs, front and side view, and scale them together so that they are the same size so when importing them into maya I can use them for reference. I scaled the character designs by using the ruler tool in photoshop and lining them up to the same size. This was easy to do but by doing this will help me in maya to keep my model a consistent size and look in proportion.  

I wanted to make that spider in the same style as the environment, which is blocky. To do this I started off creating a square, then adding some edge loops and then extruding a face on one side and made that into the head. To create the legs I extruded them one by one and reshaped them so that the legs get chubbier at the end, but also I gave the spider little booties for feet to exaggerate the comedy factor of the animation. Most of the modelling was done by extruding faces and edges so it was simple enough to do without looking at the tutorials again. I feel like I've done a good job of modelling my character and I like the way it's come together, however rigging it and actually animating the spider will be a bit challenging but I'm looking forward to the final outcome at the end.

I'm also half way through giving my model a new UV texture map so that when it comes to texturing the spider it will be easy enough to figure out what part is what when we take the texture map into photoshop. My next thing to do to the model is finish off UV mapping the spider and then adding a skeleton to the mesh. This shouldn't take me too long to do but it will be hard because I will have to give the spider spline IK handles so that its legs spring.  

Character and Narrative: Changes to our Storyboard


 After getting feedback from are peers Oscar and I decided to change something to the story. This change made the spider in the story have a motive for jumping off of the tree down to the ground. The change to the animation is that we are no longer having a human at the bottom of the tree, instead we're going to have an apple because thats's what the spider wants to eat.


The apple falls from the tree at the beginning and you hear the spider moan about that, which gives it a motive to go and get the apple from the ground but it's scared of jumping off the tree.

The inch worm comes and sees the apple on the ground from the tree and jumps off to show the spider that it's not that hard to do. The spider pumps its self up and goes for a 'leap of faith'.
 After jumping off the tree the spider grabs a hold of a piece of grass so that it doesn't fling back up to the tree using its web. However, the inch worm is already on the ground giving the spider a thumbs up but gets squished by another apple that fell from the tree.
 The spider gets scared and releases the grass and flings back up in fear.

The End!